Wednesday, February 29, 2012

Weekends progress

Well apparently it has been awhile since I made soap.
It took a little bit of running back to the Freddie's to get all the little things I needed to finish. I managed to get 50 pounds of soap made this weekend, but neglected to take photos of the measuring and cooking, I did take photos of the cutting as that's less time sensitive.
In the mold

12 pound brick


On the cutter

2/3 of the way cut

40 4.5 oz bars
Oh yeah Pictured is a batch of tea tree. I also made lavender, lemongrass and peppermint.

Tuesday, February 21, 2012

Pine Tar soap recipe

First recommended by doctors in 1869 for acne, eczema, psoriasis, calluses, corn, keratosis pilars, warts, fleas and ticks. It is also safe for dogs and cats as a shampoo. Modern versions use coal tar or chemicals. When pine tar is exposed to lye it creates carbolic acid (phenol) , salicylic acid and benzyl peroxide. If you have sensitivities or allergies to these chemicals, I wouldn't recommend this soap
Veterinary grade Pine tar, the other kind is for waterproofing

This recipe doesn't adapt well to straight cold process since it seizes at 22 seconds. After the oven processing it is moldable again, at least while its still 170f or so.

Here is my recipe for pine tar soap scaled down to reasonable batches ~about 2 pounds. I have tried a couple of additives but all of them ruined the batch with the exception of essential oils for fragrance. A little cedar oil makes this smell a bit like a campfire in the woods, without as much smoke.

4 oz castor oil
2 oz coconut (76 deg)
10 oz palm
3 oz palm kernel
5.3 oz pine tar
9.2 oz water
2.9 oz lye

I mix all my oils and the pine tar heat them till they all melt and mix then let them cool to 112f

I mix the lye into the water and wait for the temperature to come back down to about 117f

Mixing the pine tar is particularly tricky I need a second pair of hands to do it right. While I am stirring with the whisk in one hand and a stick blender in the other a second person pours the lye into the oils. You need to finish adding the lye in about 10 seconds, but you want to add as slowly as possible to get the best mixing. Continue mixing until it turns to a playdough consitency, or about 12 more seconds. Your helper needs to be protected, and very aware of you. Spilling the lye water on yourself at this point is a chemical burn in under 30 seconds. Even with protective equipment you can still get burned if your not careful.

Once it is done letting me mix it I zip tie the bag closed and set it in the oven at 215f. A 2 pound batch will take about 60 minutes. Like all oven processed soaps you can look at it and see how cooked it is. The top will be translucent and covered with glycerin sweat, It will have smoothed out and taken on a non grainy texture. If your using the bag method you can pull it out and palpate for hard spots to be sure. Hard like wet clay. Hot pads required, your grabbing a 200f degree object.

Once cooked, mix thoroughly to get the glycerin back into the soap, otherwise this will be a very drying soap. Pour into your mold and allow to cool for at least 2 hours. Release from your mold. You can cut the soap at this point. And while the soap is usable it should really cure 24 hours in air, and 3-4 days in a mostly sealed container.

Another plus to this soap is its amazingly spoilage resistant. I have bars that are 5 years old and still good, not as good as in the first 2 years, but still good soap.

Monday, February 20, 2012

Tools and supplies

Anything that is going to come into contact with either the lye or the raw soap MUST be made of Stainless steel, glass or a non reactive plastic.
For this project I have amassed;

Various Oils
     Castor
     Palm
     Palm Kernel
     Coconut
     Essential Oils for scent
     Bentonite clay for shaving soaps.
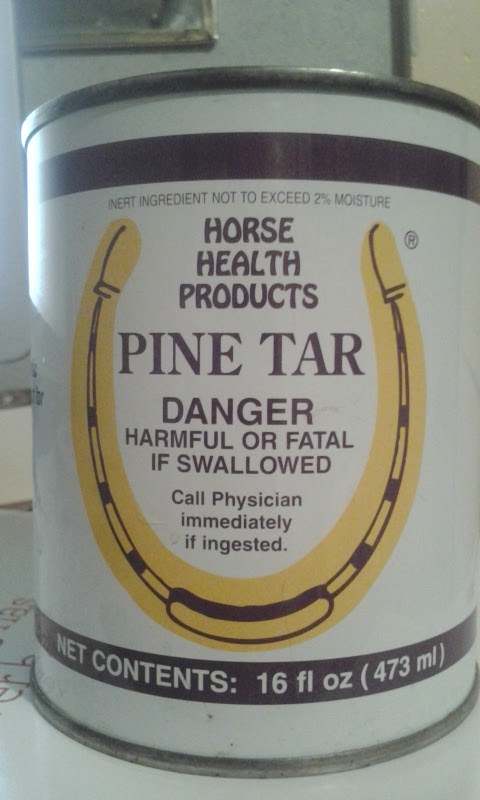
Lye
Distilled water (tap water WILL NOT work, even the super soft water we have here has too high an ion/mineral content and will cause issues)
Personal protective equipment
     Gloves
     Eye protection
     Good ventilation
     Access to running water
     White Vinegar
Stirring devices, ie. whisk, stick blender.
Digital thermometer (very important)
Hot pads
Glass or stainless steel measuring cups
A semi accurate scale. I use a kitchen scale, +/- 2 grams is not significant in a 5300+gram recipe.
An accurate scale for measuring the lye to .1g (they say .1g  but all of these 20$ digital scales seem to be accurate only to ~.2g)
A stock pot (or crock pot for smaller batches)
Reynolds Oven Bags (not actually necessary but these will keep your essential oils and glycerin from boiling off.)
A soap mold (a shoe box lined with parchment or wax paper works as a disposable mold for small batches)
A soap cutter
Packaging if you so desire
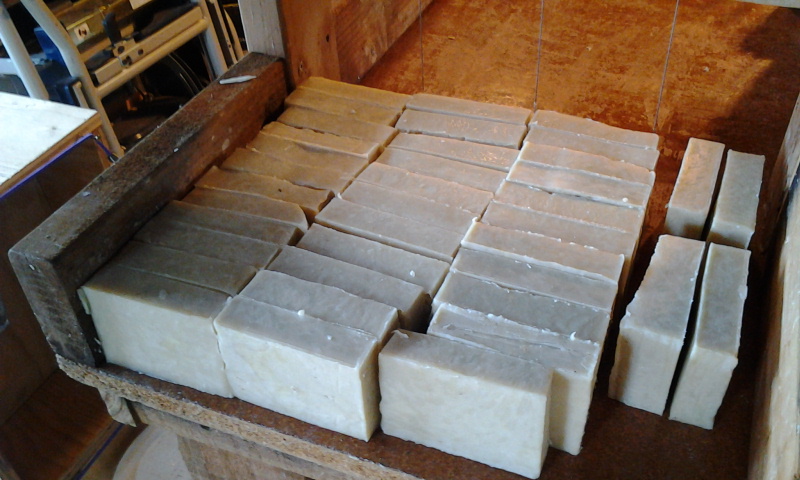
Curing space. During the production of soap water is a byproduct of saponification. Letting the cooked soap sit for a couple days in open air will make the soap harder and longer lasting. Time will also allow the soap to mellow. When it's fresh out of the oven there are still some un-reacted products and the soap is slightly basic. (ph ~8) 24-36 hours later (depending on ambient temps and couple of other factors) the soap is done saponifying, and the air is drying the water out of the product.

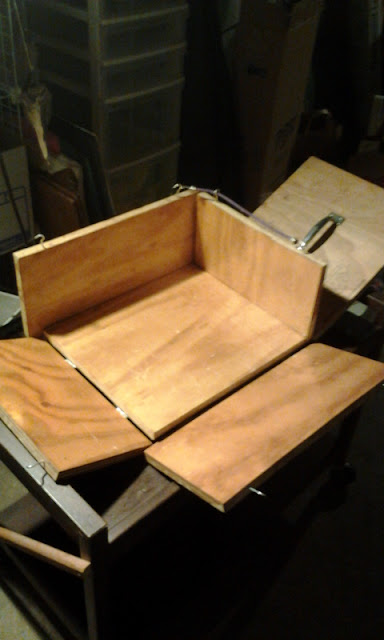
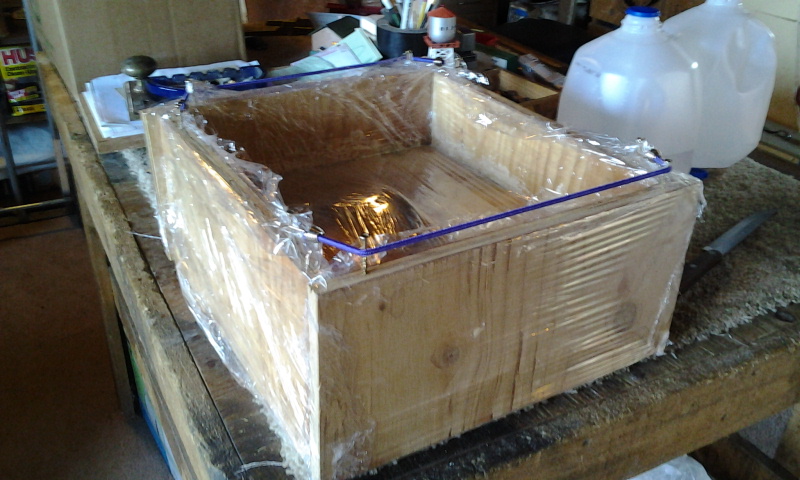
My soap form with hinged sides. It will hold up to 50 pounds of soap. The lid is  separate  and sitting in the back (upper right)
The form was simple enough the hinges allow the sides to fold away from the soap block. I had trouble with a different mold design, releasing while the soap was warm was destroying batches. Waiting for the soap to fully cool was making the release difficult as well and destroying batches. This was my solution.

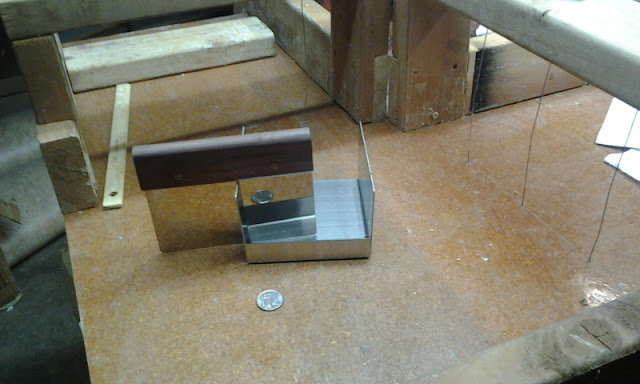
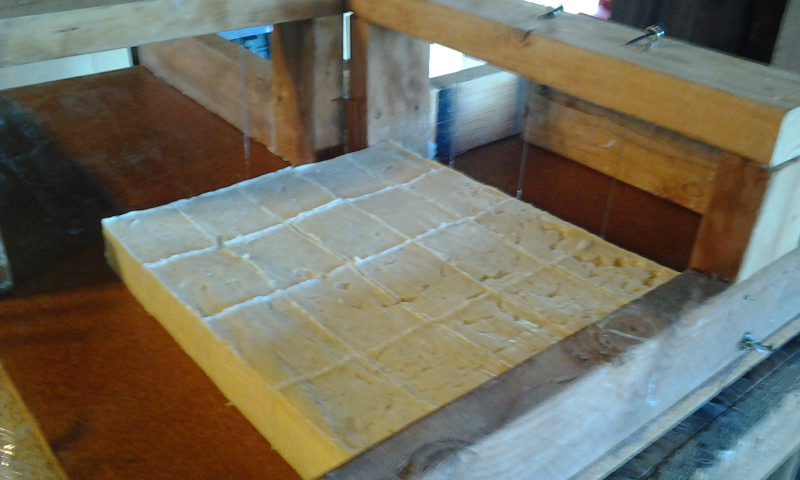
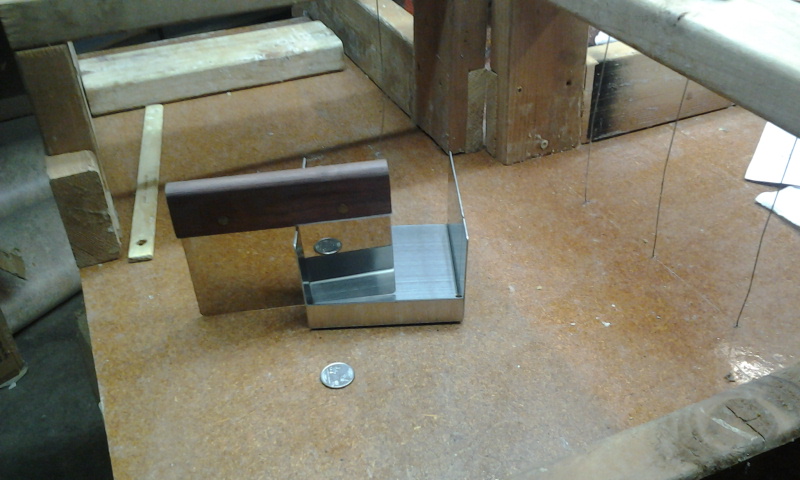
A quarter in front of a commercial Stainless cutter sitting on My wire cutter. Which needs a little touch up after 3 moves and 2 years in storage.
I originally had it set up to cut the entire brick in just a few passes, but the physics of cutting that large a surface were against me. I slice the block into logs, then slice the logs. The stainless cutter in the foreground has never been used, it was presented to me. Had I been making 2 pound batches every week it would have been ideal. At this size of manufacturing its pointless.

Friday, February 17, 2012

Oils and soaps

I picked up some oils today. Seems like a good time to address the most important part of the project.
Good oils make good soap.
I designed my recipe using Soapcalc. A wonderful site with good information.

My recipe uses Castor, Palm, Palm kernel, and Coconut oils.
The palm oil makes cleansing with some hardening and conditioning.
The palm kernel makes the soap hard, cleansing and bubbly
The coconut makes the soap harder, is very cleansing and very bubbly
The castor oil wouldn't harden into soap on its own, but makes the soap very creamy bubbly and conditioning.

I spent a bit of time walking around and looking at handmade soaps and I noticed they mostly came in 2 varieties. Glycerin, or olive oil based, and I didn't like either. I checked soapcalc and saw castor oil was a decent approximation of olive for emoilliency. Castor oil when processed doesn't have a residual smell in the same way that olive oil does.
While, palm oils have become politically charged, I managed to find a source that is US produced.
My coconut oils come from a fair trade company in the Phillipines.
The castor oil is also US sourced as harvesting can be dangerous to people.

Scenting soap is only tricky in that you can go overboard pretty easily with pure oils. An example would be in my 12 pound batch of peppermint soap I use 1 single  ounce of peppermint oil. Many of my batches are 2 ounces for other oils but the peppermint is a different beast. Same with some of the flowers like Ylang Ylang. 1/2-3/4 ounce per 12 pounds is ENOUGH!
The soapcalc page asks how many oz per lb in your batch for its calculation....

Not all essential oils are safe for use. To be sure a scent isn't going to cause problems I usually refer too my copy of "The Encyclopedia of Essential Oils" by Julia Lawless. I would love to use Daphne oil for example in soaps but that stuff is toxic. Do a little research if your going to scent your soaps in this manner.
Patchouli, rose, lavender, peppermint, sandalwood, jasmine, all those scents you normally find in perfumes and colognes. These are a good place to start since most of them started out as essential oils before it became possible to synthesize the fragrance.

Wednesday, February 15, 2012

Getting soapy!

The following information is exactly that, information, I have gathered through experience. I assume no responsibility for what you do with the information contained in this blog. Some of the processes discussed can be dangerous without proper precautions. It is your responsibility to take precautions for your safety and that of those around you. While the hot oil can cause minor burns, the lye is dangerous and needs proper handling procedures.

I have made quite a bit of soap before and figured I would do a little DIY on my process of making soap. I ordered the materials today and am hoping to start making batches of soap next weekend (Feb. 25, 2012).

I use the cold process/oven process method. Cold process formula finished with 2 hours of low temp cooking in the oven. This replaces the 4-6weeks of curing for cold process soaps. The soap is usable as soon as its cool, but is far far better a week later after the reactions have stopped.  I have discovered several tricks to getting the product I want, which I will be sharing including a basic soap recipe, and tools to point you towards designing your own recipes.

I will also demonstrate making pine tar soap which is a particularly tricky one to batch since it has a working time of about 22 seconds. That's 22 seconds from starting to add the lye to the oils until it is an unstirrable mud that's even thicker than bad oatmeal. The oils in the pine tar speeds the reaction of saponifying the oils. Many citrus and pine/evergreen oils have similar but less drastic effects.

There are a couple of common misconceptions about soap I would like to address. 

The FDA's definition of soap is "Ordinary soap is solely made up of fats and an alkali." Most things we buy today are actually detergents or cleansers, and not soap. They are made from petrochemicals and byproducts of other industries.

Many people think of handmade soaps as being harsh. Well, grandma's soap probably was harsh, but that's a function of having to much lye in the batch. Properly measured soaps can be emollient or cleansing depending on what recipe and additives you use. 

Many people think glycerin soaps are good, they come in clear colors! The clear is made by adding alcohol, or an alcohol sugar to the soap. They are galled glycerin soaps because you have to add glycerin to them to make them less drying. Handmade soaps produce glycerin, you will see some on top right after the oven processing, I stir this back into the soap.

This is chemistry so exact measurements are key to success. Slop will ruin a batch of soap.

A word about Lye.
Sodium hydroxide (NaOH) or Lye, is used in the soap making process. When you mix the alkaline Lye with the oils (fatty acids), the lye breaks off the end of (up to) 3 fat molecules and attaches to them. This makes a polar molecule that's sort of salt and sort of oil. This allows for it to be absorbed by water and precipitate out onto dirt and oils.  When enough soap has attached to cover the grime its carried away by the water.
Lye is caustic and will cause chemical burns with exposure. After the lye has processed the fats, there is none of the chemical remaining in a batch of soap. The OH- has broken off and formed water with a H+ liberated from the fat. 
I will talk about safety before the process of handling Lye.